| Learn how to DIY yourself some amazing concrete Christmas gifts |
Christmas is just around the corner! And if you’re struggling to come up with present ideas, maybe try your hand at some amazing concrete DIY. Don’t worry; it’s not as hard as you think!
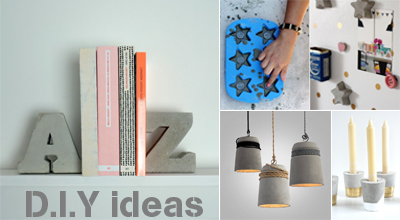
The wonderful thing about DIY with concrete, you can literally make anything you want, you’ve just got to get creative. Now if you don’t know where to start, I’ll give you a hand. Here are some of the more popular projects from this year:
- • Fridge magnets
- • Cutting board
- • Candle holders
- • Table lamp
- • Bookends
- • Letters
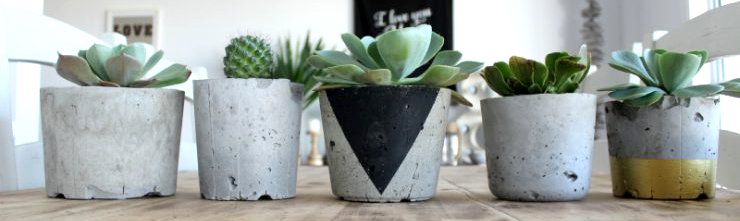
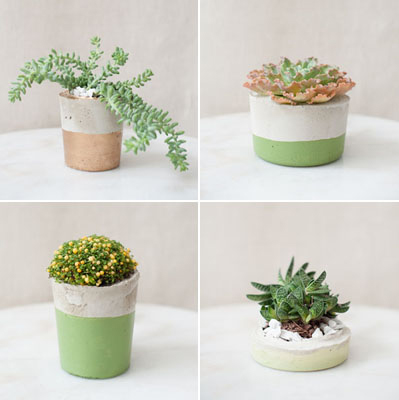
- And of course, you can’t forget the concrete pot/planter! Each of the above follows roughly the same concept; mix the concrete, place in the mould, and wait to dry… simple right?
Just to keep it easy we might run you through how to create your own concrete pot, then you can let your creativity run from there.
To start we need the following materials:
- • OneMix Mortar bag
- We recommend using mortar only as it doesn’t have the stones in the mix, so it creates a smoother finish. But if you want the look of stones, any other bags in our OneMix range will work for you! Check out our store finder at www.onemix.com.au to find a local store near you!
- • Water
- • Cooking oil
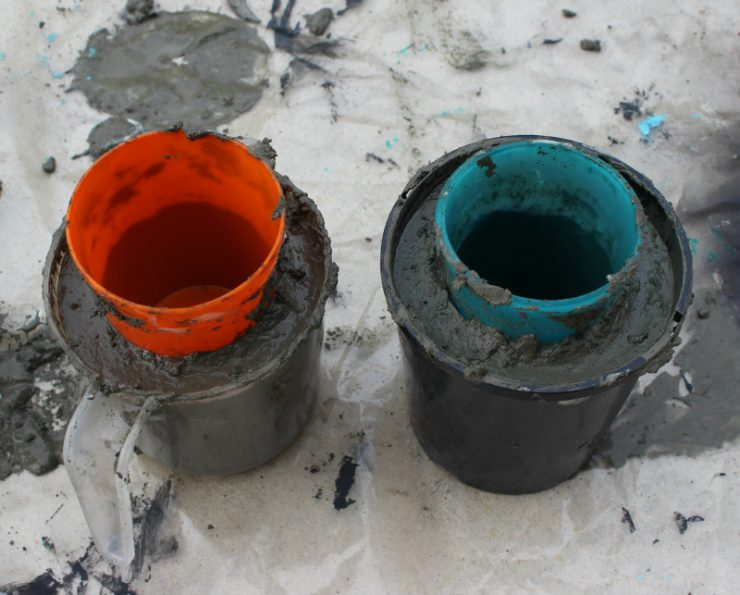
- • Bucket and stirrer (make sure these are objects you don’t mind getting concreted)
- • Large and small plastic bottles/containers in whatever shape you like best
- Make sure that the plastic is strong enough to hold the weight and shape of heavy concrete. If the sides a flimsy, they will warp and you’ll end up with some odd shaped planters (unless that’s the look you’re going for!)
Optional materials
- • Trowel
- • Tape
- • Paint to decorate
- • Paint brush
- • Succulents and soil
- • Drill and concrete drill bit
Let’s get started!
Step 1:
It may go without saying, but make sure you grease up the containers thoroughly! It can definitely be tough to get the concrete out of the moulds, so take the time to grease them up well. Especially if you want to use these containers again at a later date.
Step 2:
Mix up the concrete by following the directions on the back of the bag. If you’re having trouble, or want more advice, take a look at our OneMix website on each of the product pages. There are some handy hints and videos for each product on how to mix the concrete properly.
Step 3:
Time to start pouring the mix into the moulds! Make sure to put on some gloves (safety first) You can either scoop (recommended as it’s more controlled) or pour the concrete mix into the larger mould first. Tap the moulds to remove any air bubbles before placing your smaller mould (greased on the outside!) into the mix. This forms the hole to put the plants in. The smaller mould will need to be weighed down with some pebbles to stop it from rising.
Step 4:
Depending on the finish you’re after you can use a trowel at this point to smooth off the surface for a cleaner look, but that’s up to you.
Step 5:
Now we wait for the mix to set! You’ll probably find the mix looks set within a couple of hours, however we recommend you wait a full 24hrs before attempting to remove the concrete from the moulds, just to make sure it’s set all the way through.
Step 6:
To remove the pots from the moulds, carefully try to shake them loose. If this is proving too difficult you can try cutting away the plastic.
Optional step:
Depending on how you want to use the plants, it’s probably best to drill a hole through the base for water drainage. If this is the case, we recommend you leave the concrete pots (unmoulded) for another few days to completely cure.
Step 7:
Voila, concrete planters! Now it’s time to get creative with some paint. If you’re a perfectionist or not confident in your free hand painting abilities (like myself), use some tape to create clean edges. Check out some of the below images for some inspiration!
Finally, it’s time to put some plants in these pots. Woo Hoo!
Now as I mentioned, concrete planters are just one of the many amazing concrete DIY’s that you can do. So get creative and make some amazing home-made gifts for your family and friends this Christmas!
Don’t forget to like our Facebook page @OneMix.SC for more concrete tips.
Wishing you all a very Merry Christmas and Happy New year! From everyone in the OneMix team.