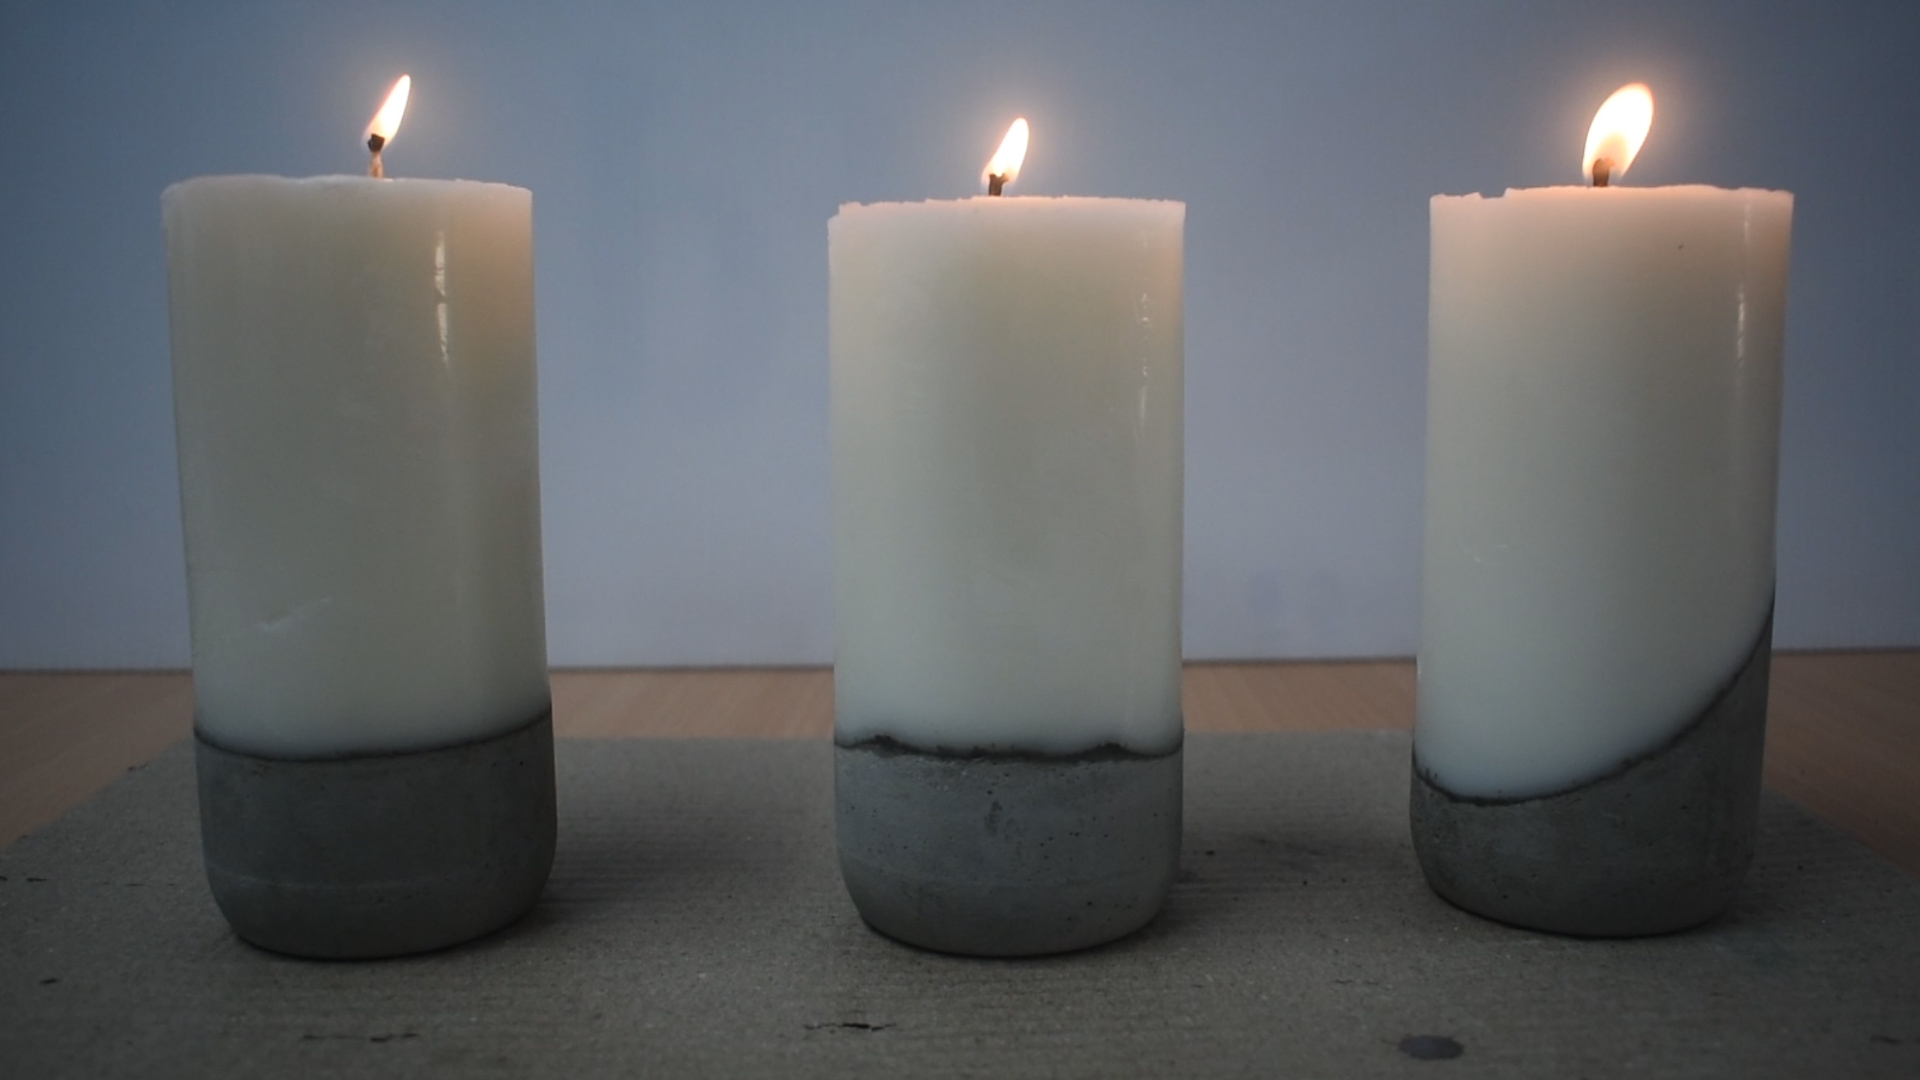
Ever thought of making your own candles? Even better, ever thought of using concrete when you made you candles? It can create a really striking effect that’s the perfect balance of minimalistic and eye catching. Plus, they make for a super affordable handmade gift idea!
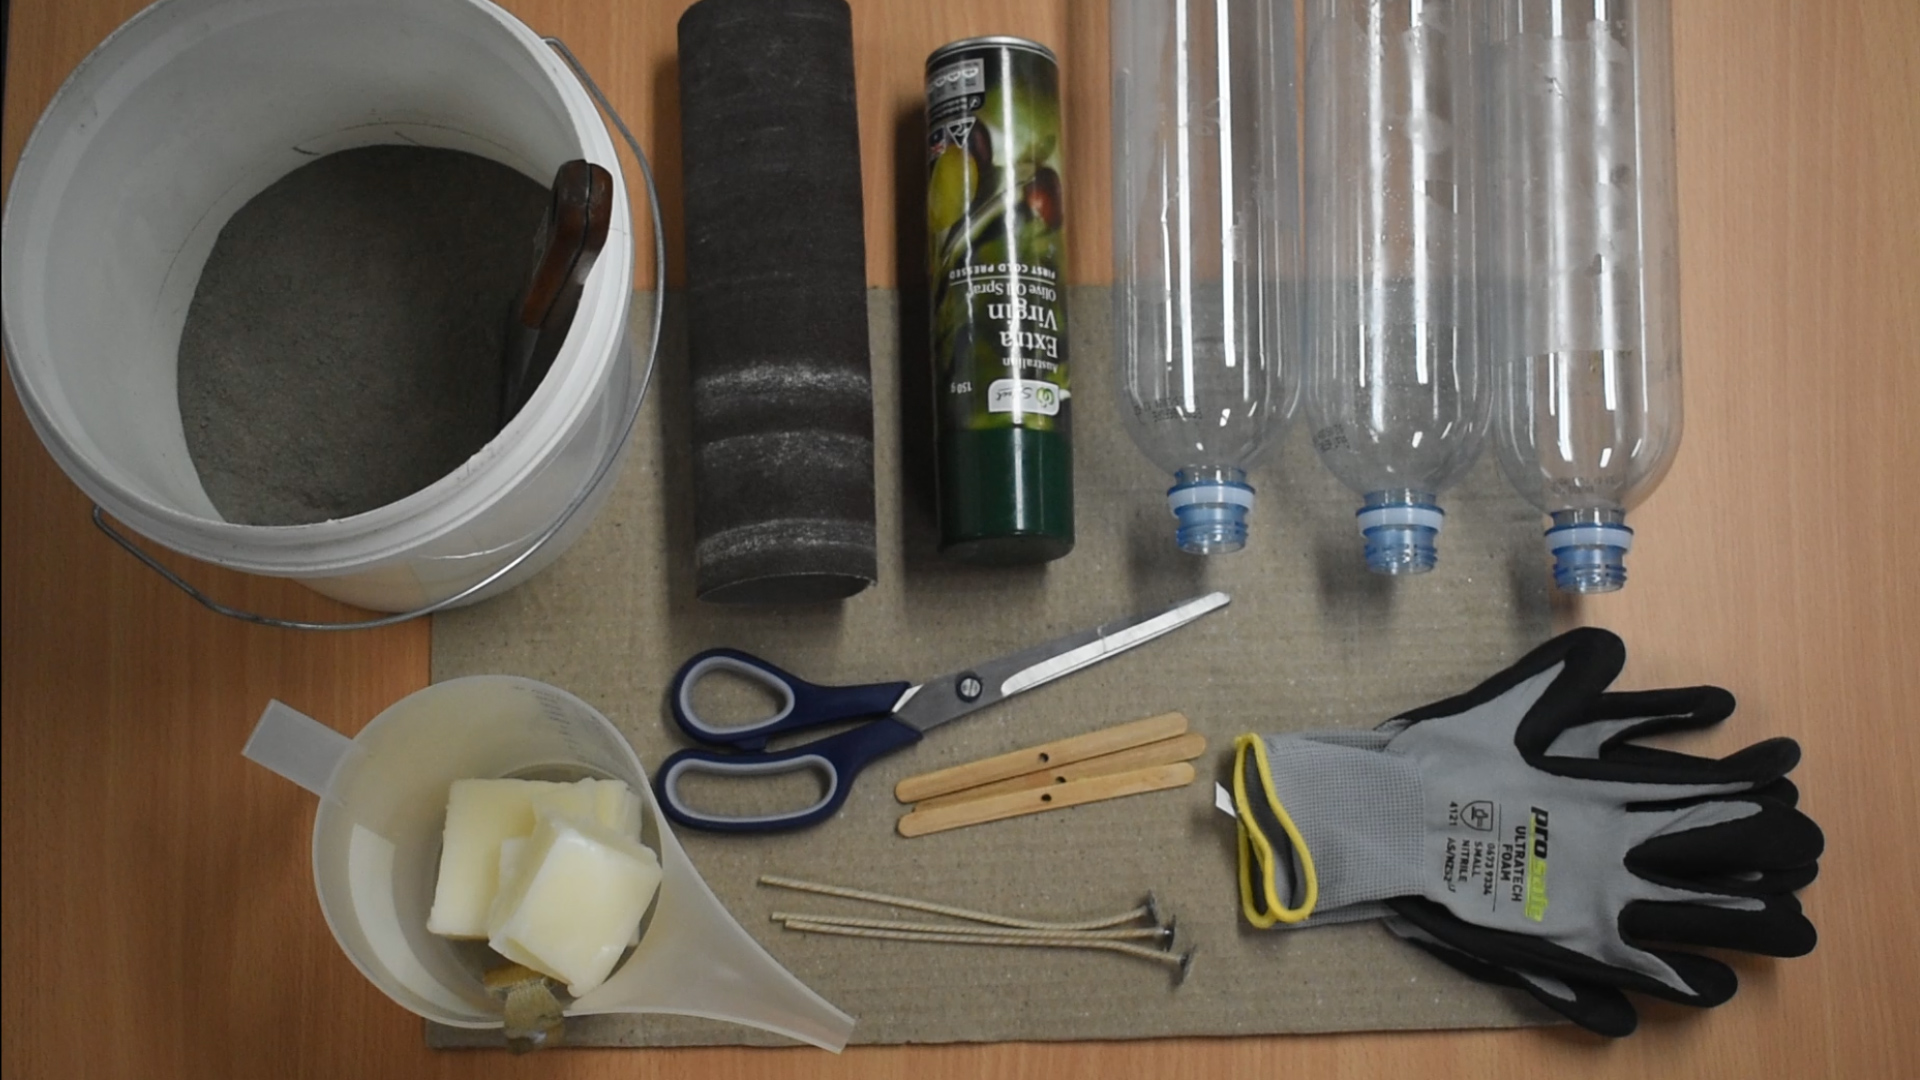
Things you’ll need:
- OneMix Mortar (watch our “How to mix Mortar for DIY projects” to get the right consistency)
- Wax melts
- Lightweight empty plastic containers (water bottles are probably the easiest to work with)
- Non-stick cooking spray
- Candle wicks
- Paddle pop sticks
- Mixing tool (we used a paint scrapper)
- Pouring jug
- Scissors
- Gloves
Starting tip-
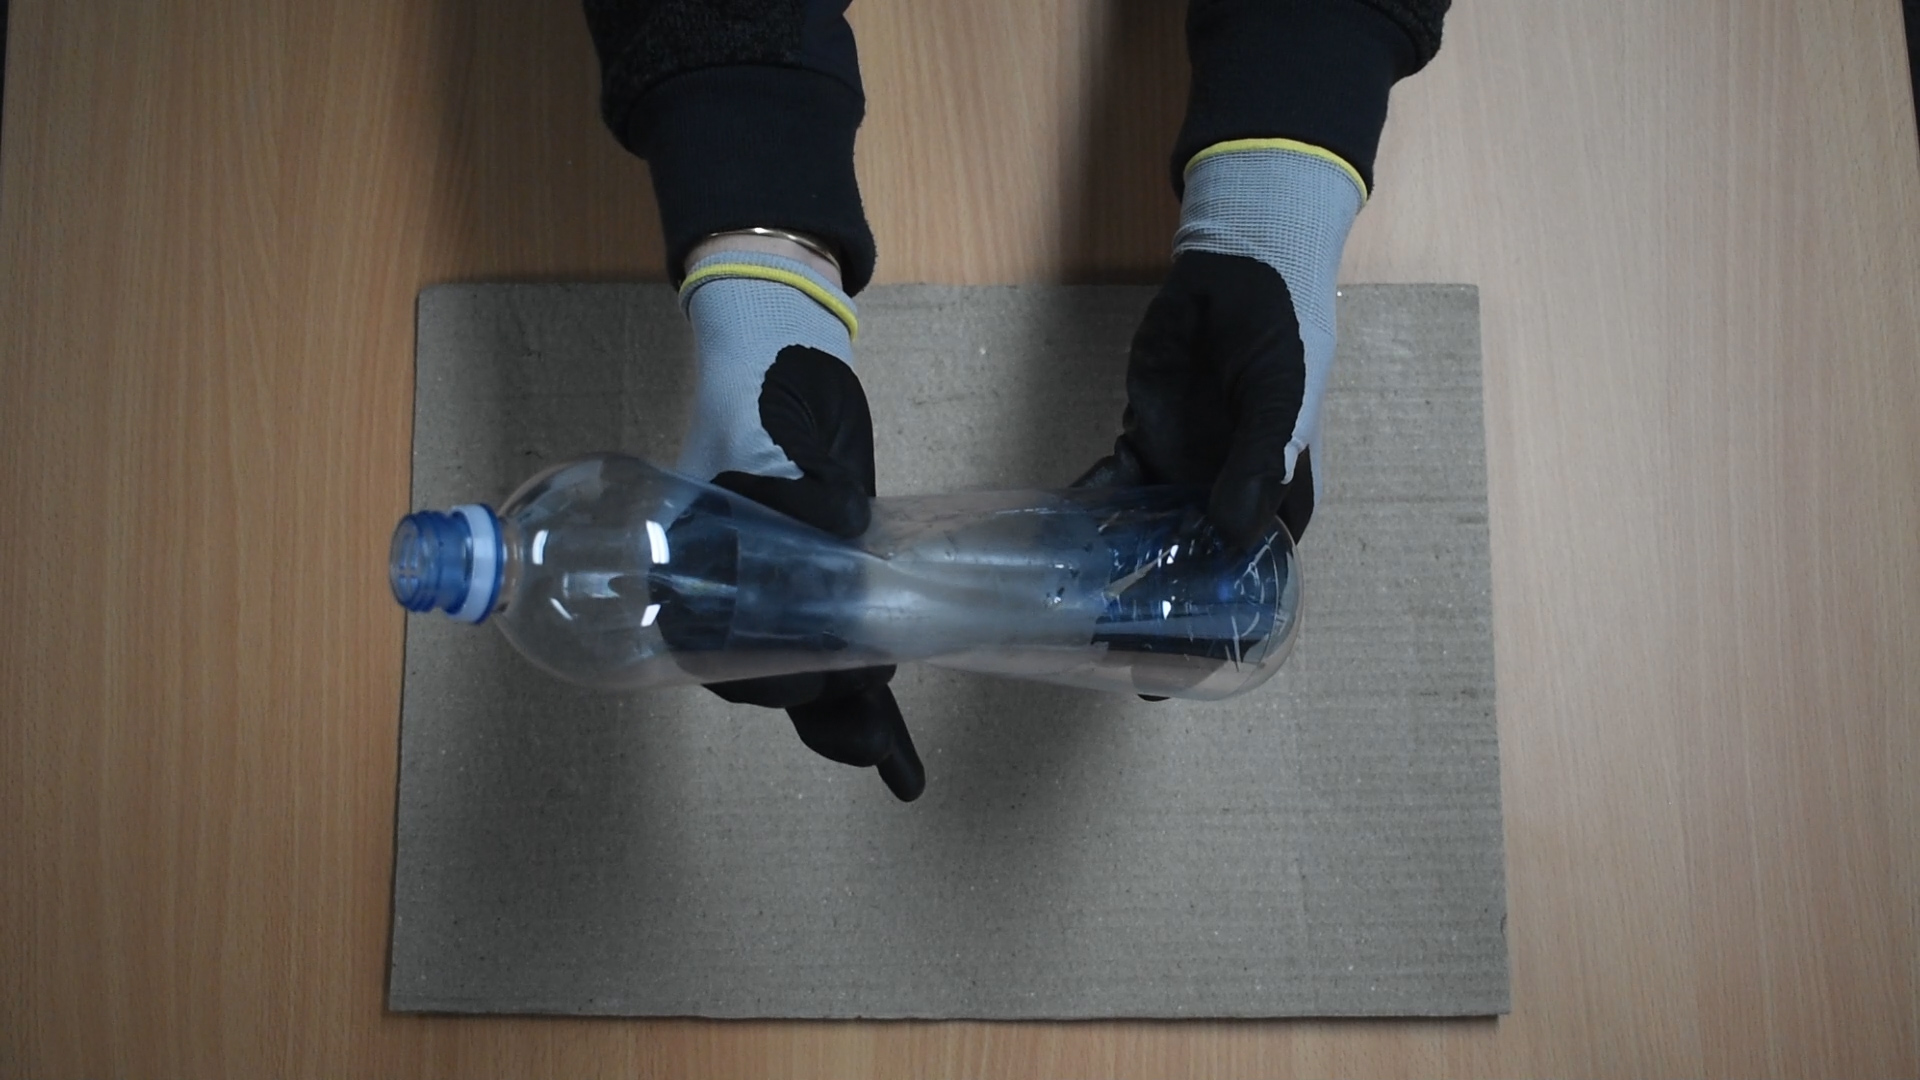
You can definitely use any type of plastic container you want depending on the shape or look you’re going for, just make sure it’s light weight. This makes it easier to remove ones the candles are set. But water bottles are definitely ideal, not only will they be easy to pull off, but you can double the top section as a funnel to keep the sides clean when pouring the concrete (step 3).
We used soft water bottles to make it easier to remove once the candles are set.
Step 1 (optional):
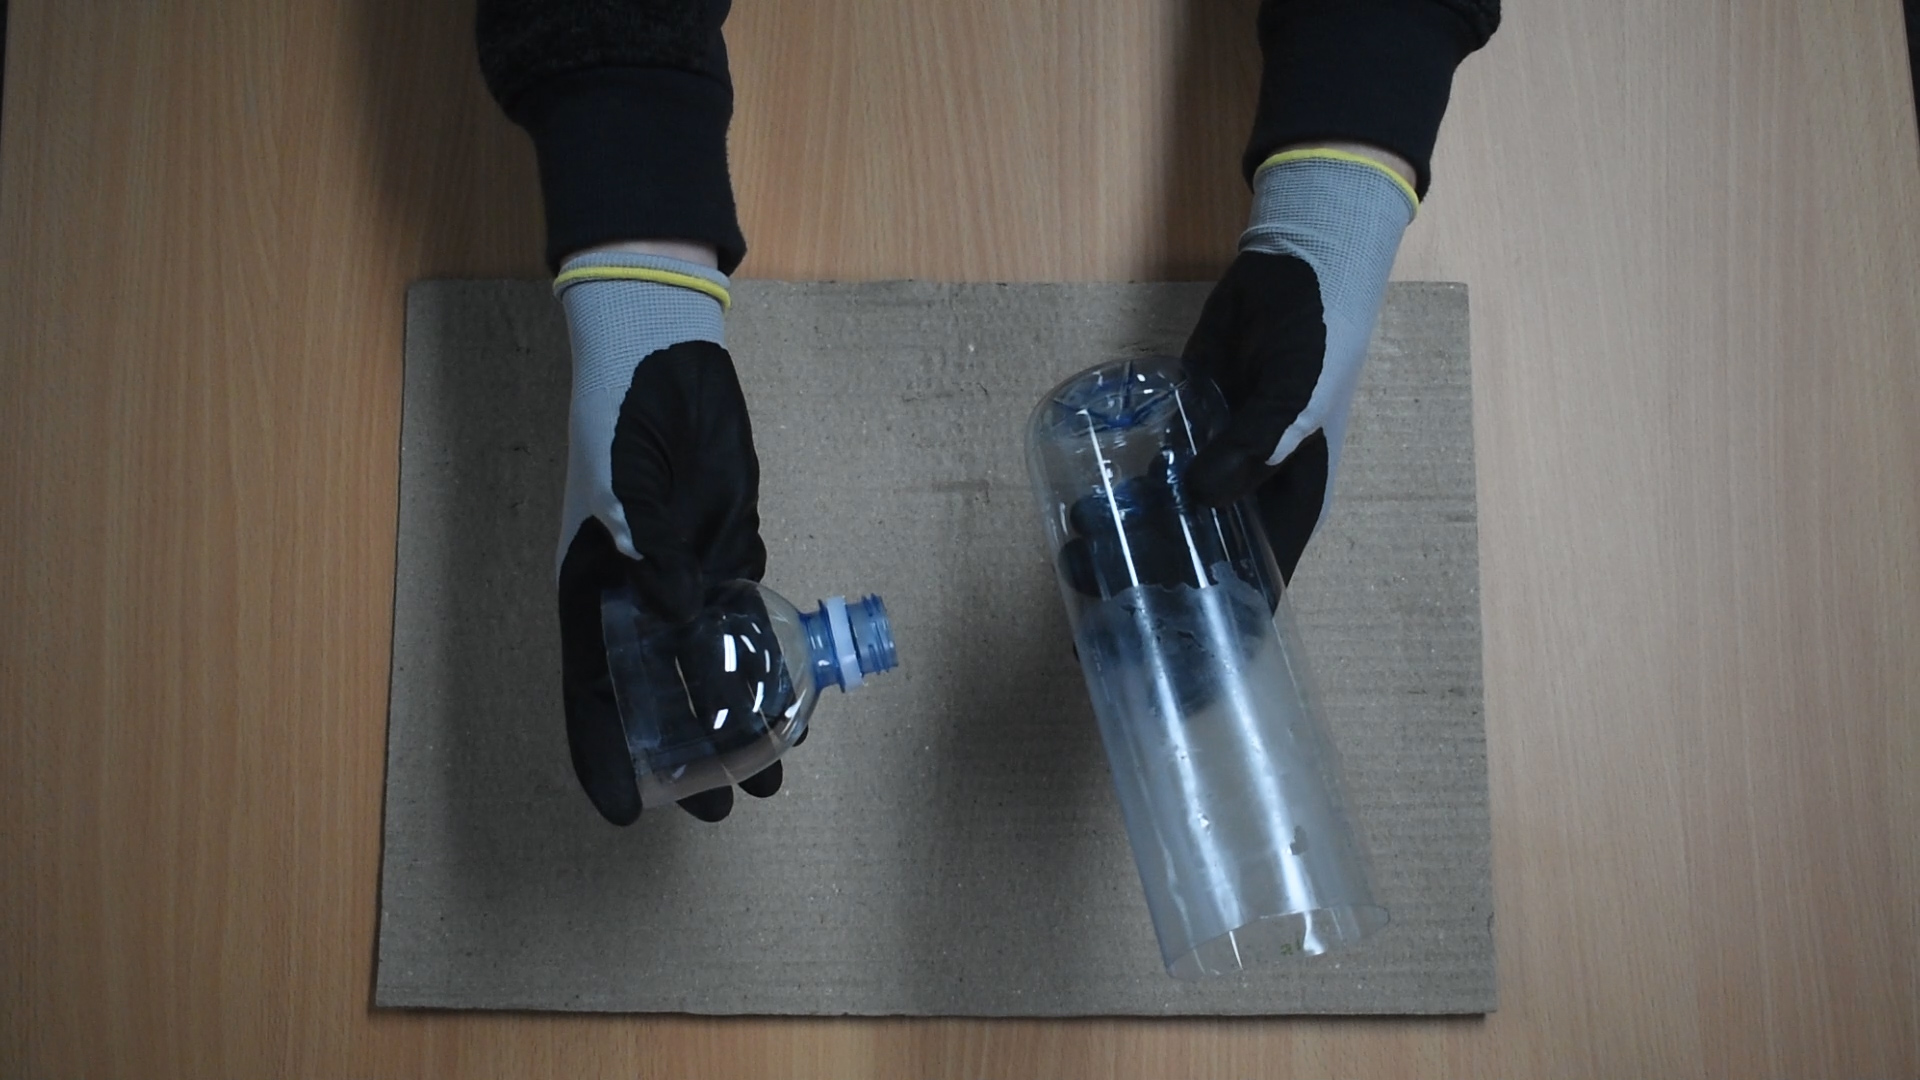
If you have decided to start with water bottles, or another container with a narrow opening, use your scissors to cut a wider opening. This will make it much easier to add the concrete and wax in your chosen molds.
Step 2: Mix up your Mortar
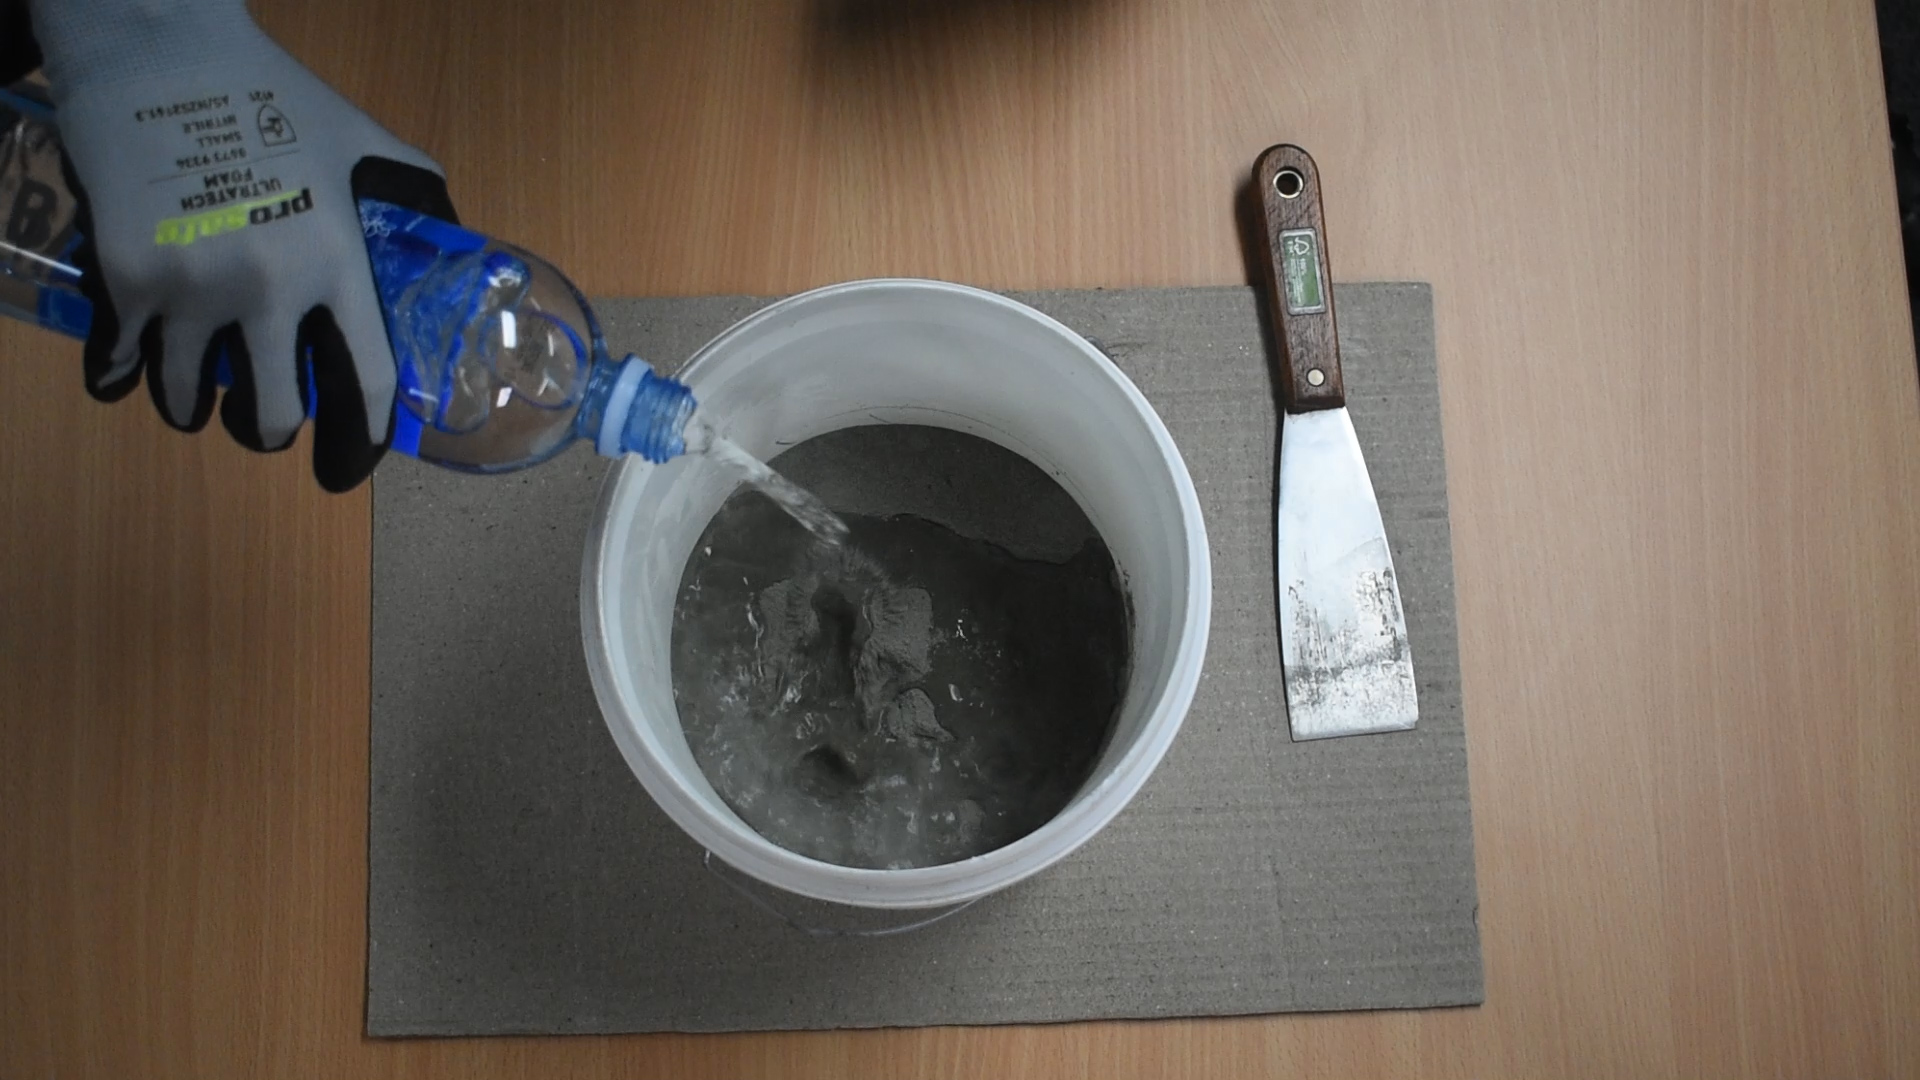
Simply add water and combine until you have a cake batter consistency. Adding a little bit more water here for a slightly thinner mix will help reduce bubbles and therefore air pockets in your end product. But it will increase your setting time, so keep that in mind if you’re time poor.
Step 3: Pour Mortar into the molds
Start this step by spraying a light coating of your non-stick cooking oil inside the containers. This will make it much easier to remove the concrete and wax from the mold.
If you’re using a plastic water bottle, flip the lid upside down and place it in the top of the bottle to use as a funnel. Start pouring in your Mortar and fill up to where you like – we aimed for about one quarter way.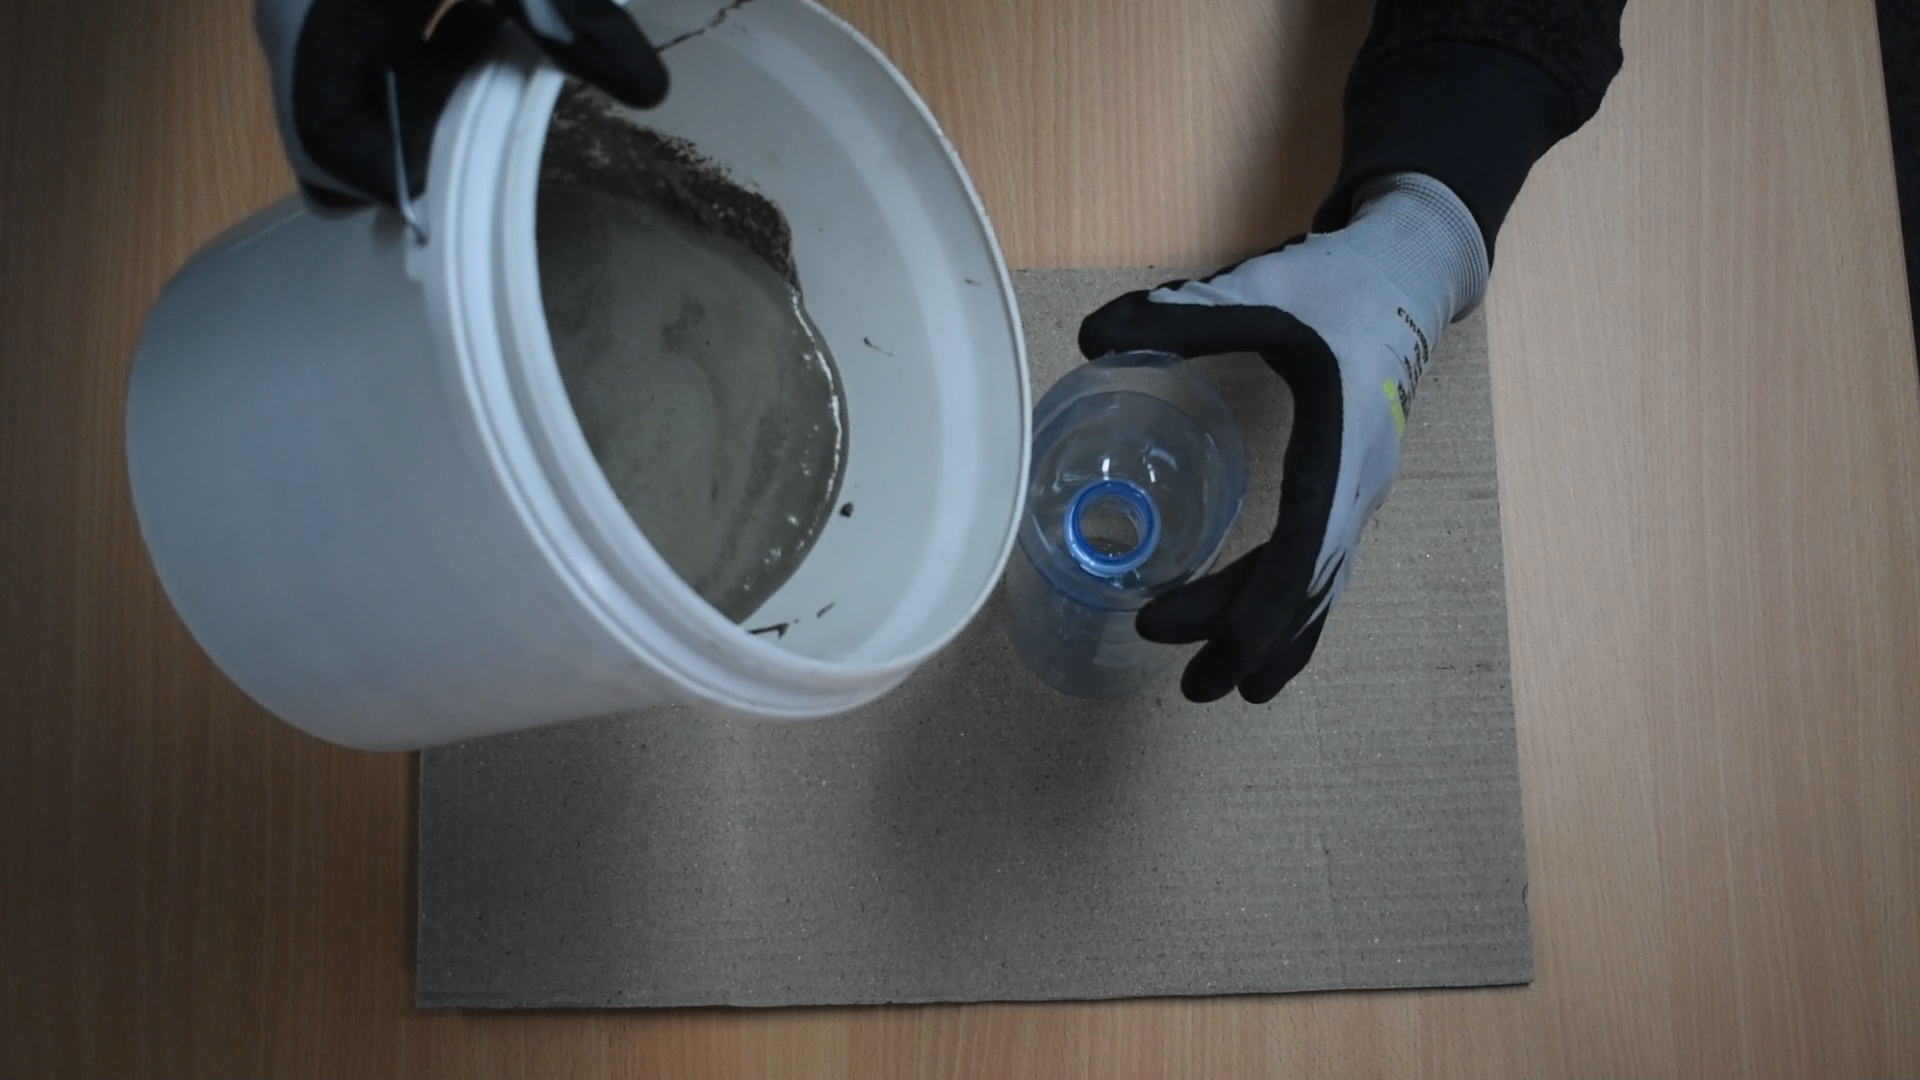 Firmly hit the bottom of the mold against your work surface to force out any stuck air bubbles. Do this until you don’t see any more bubbles rising.
Base style tip-
At this point you can choose to change the style of your base if you want. Leaving it at is will give you a clean, straight line between the mortar and the wax (1). Alternatively, you can either rough up the edges for an uneven look (2) or leave the mold on an angle for a diagonal line (3).
Step 4: Let it set!
Before you start thinking about the wax, you’ll want to make sure the Mortar is set. We left ours for about 48 hours before continuing just to be safe as we added that extra water.
Before continuing on, we suggest giving the inside of the containers a quick wipe to remove any concrete that may be around the sides. Use either a cloth or paper towel and a little bit of water.
Step 5: Wicks
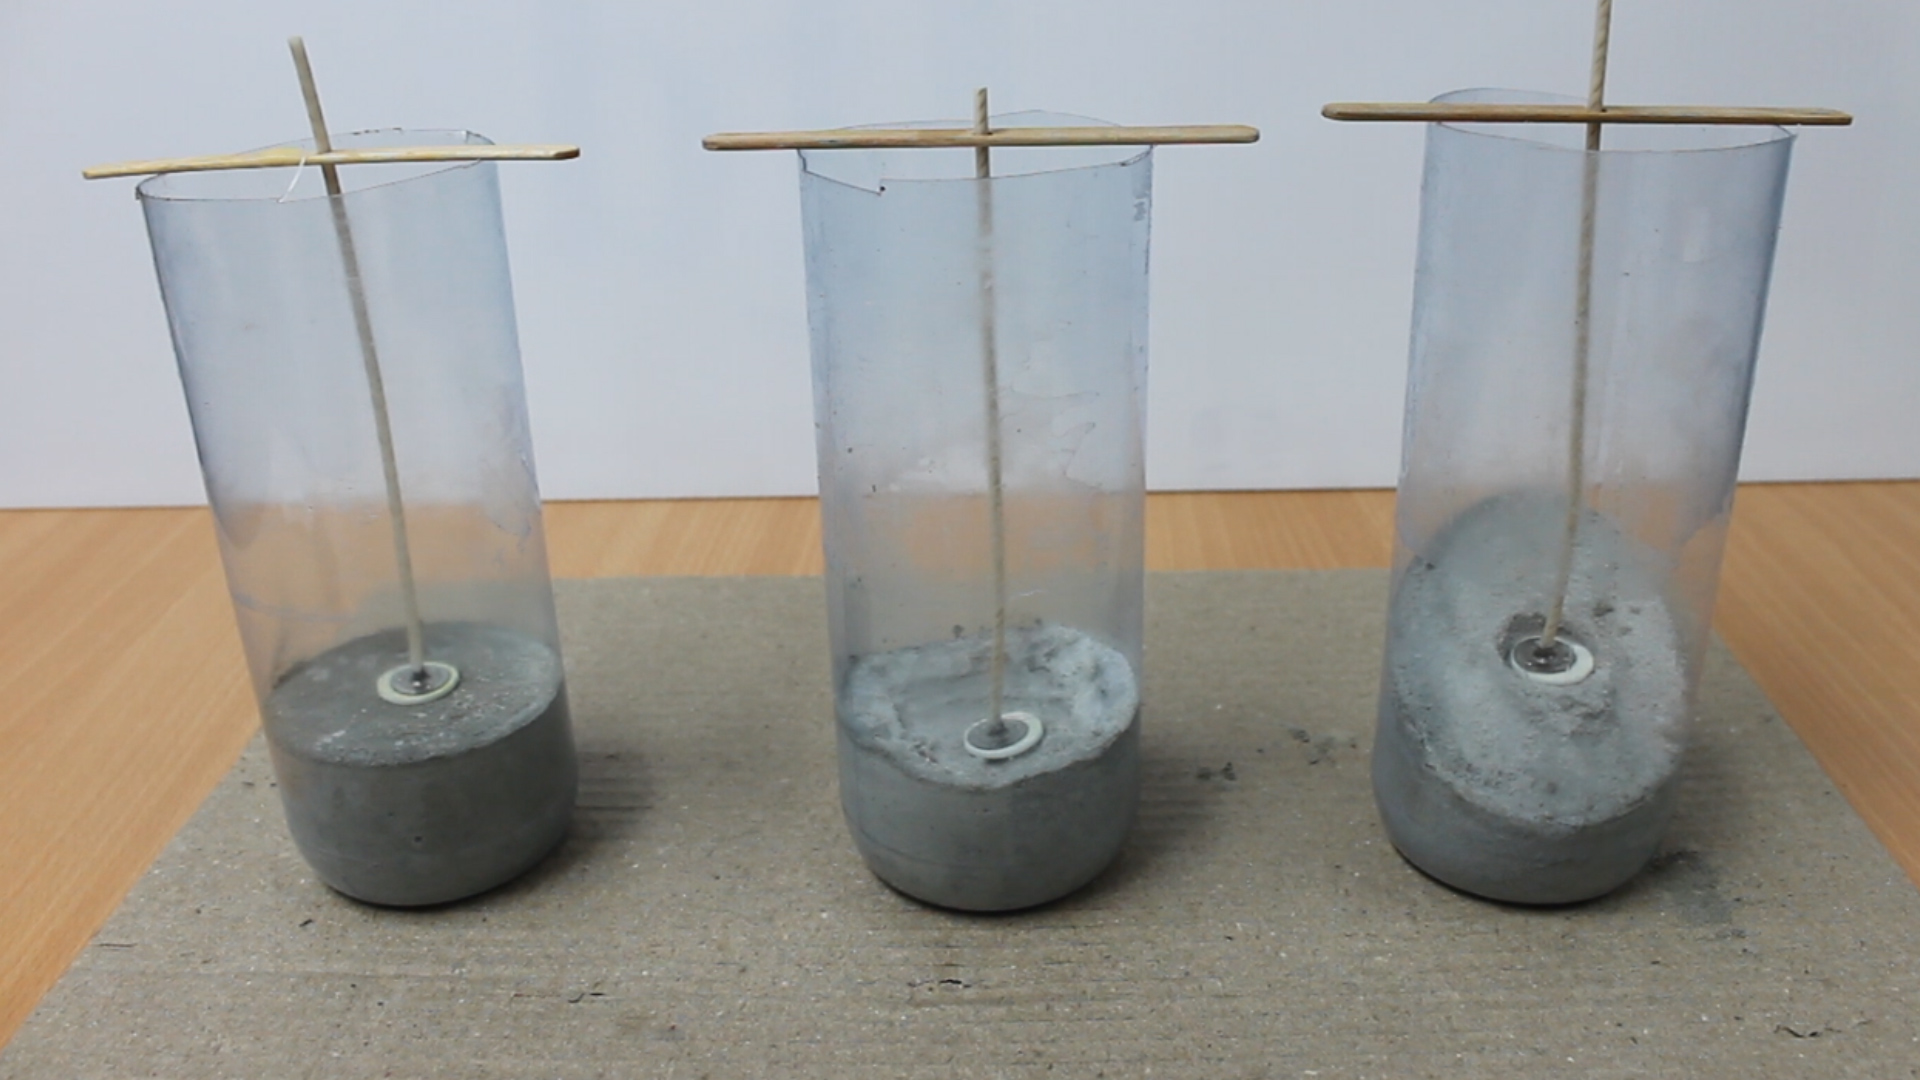
Place the wicks in each candle, making sure they’re centered and standing upright.
Place your wicks in the centre of the candle and stabilise it with the paddle pop sticks.
Step 6: The wax
Using your pouring jug you’ll want to melt the wax until it no longer has any lumps and is relatively clear, this can be done either in the microwave or over the stove in a double boiler. Just make sure you follow the instructions for the wax that you choose, some need to reach specific temperatures before they can be poured.
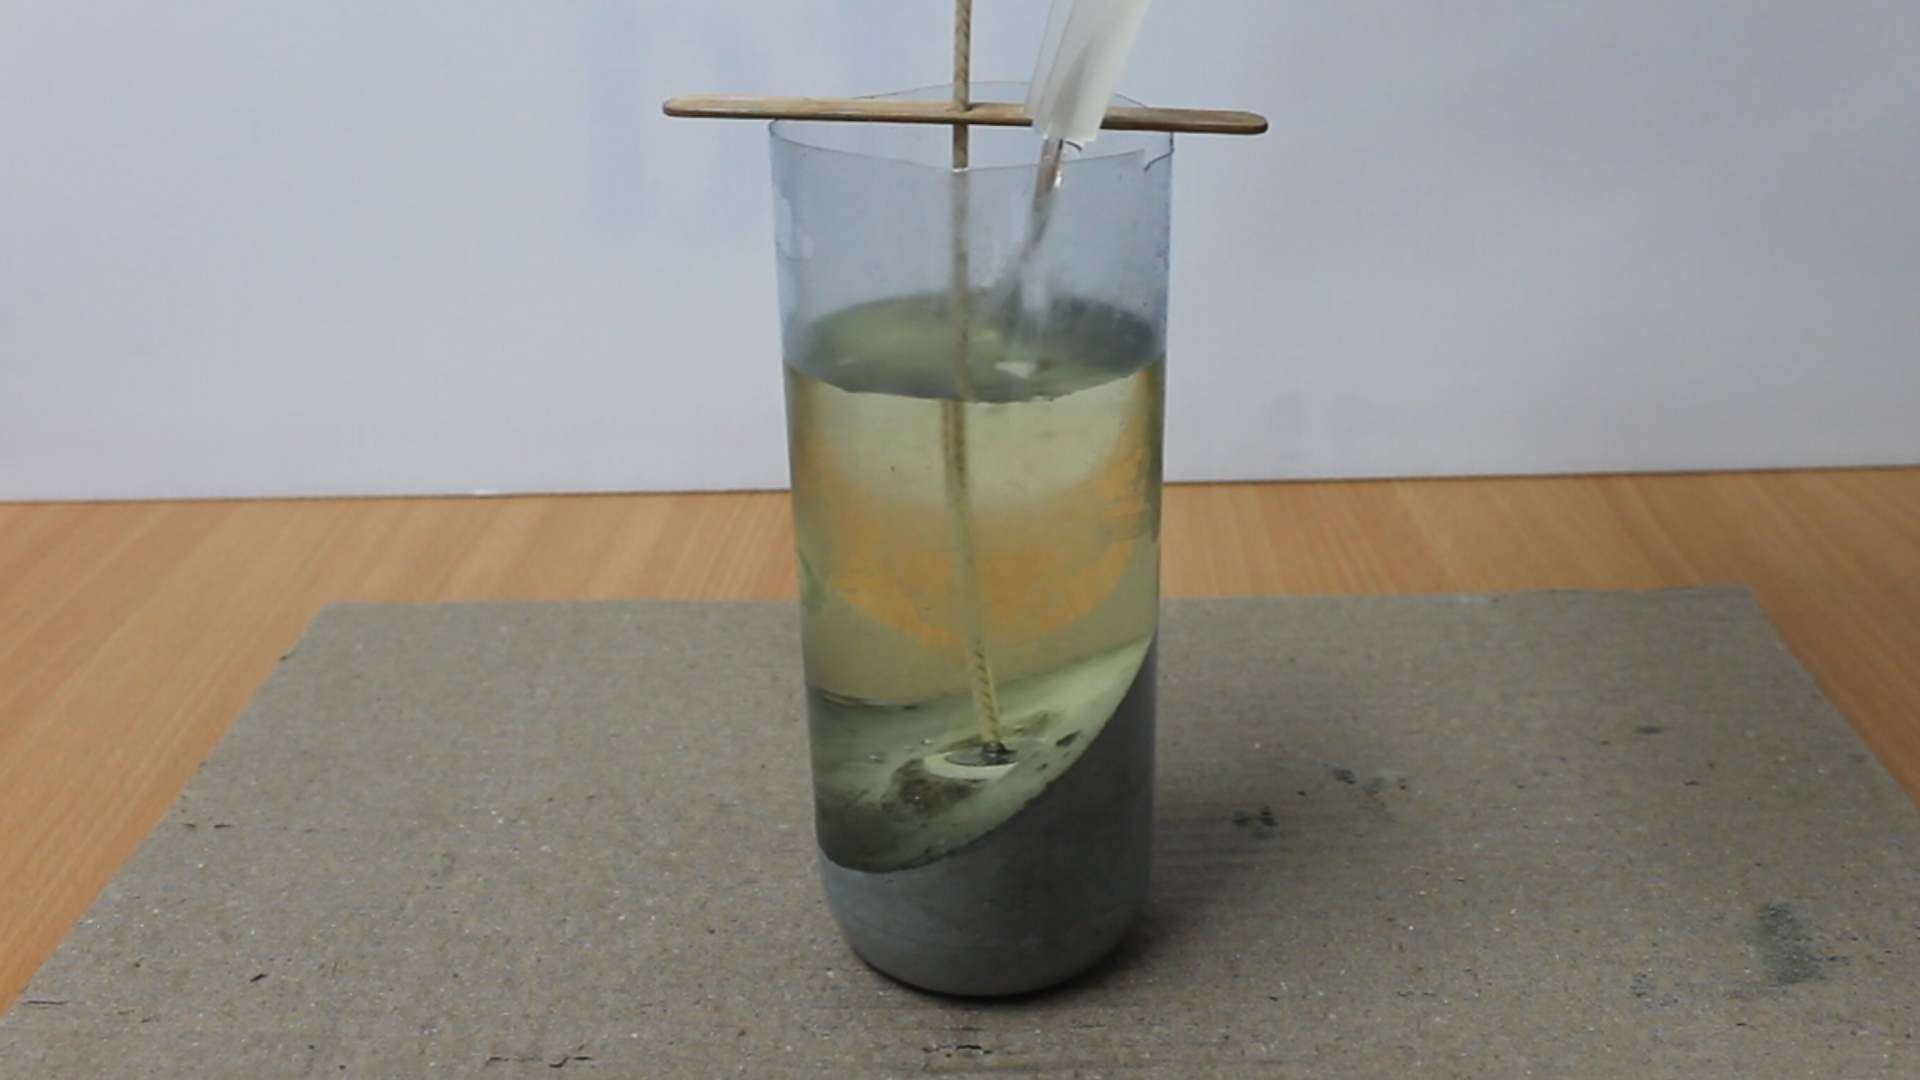
Before it starts to cool too much, pour the wax into your containers to your desired height. Make sure you leave at least a gap at the top of a least a few cm’s to make it easier to remove the plastic later.
Without moving the container around too much, gently tap the candle to release any trapped air bubbles. Now let it set overnight.
Step 7: Removing the containers
Using the scissors, cut slits all the way around the top of the container. Carefully start peeling down a split, one at a time, working clockwise, until you’re able to remove the candle.
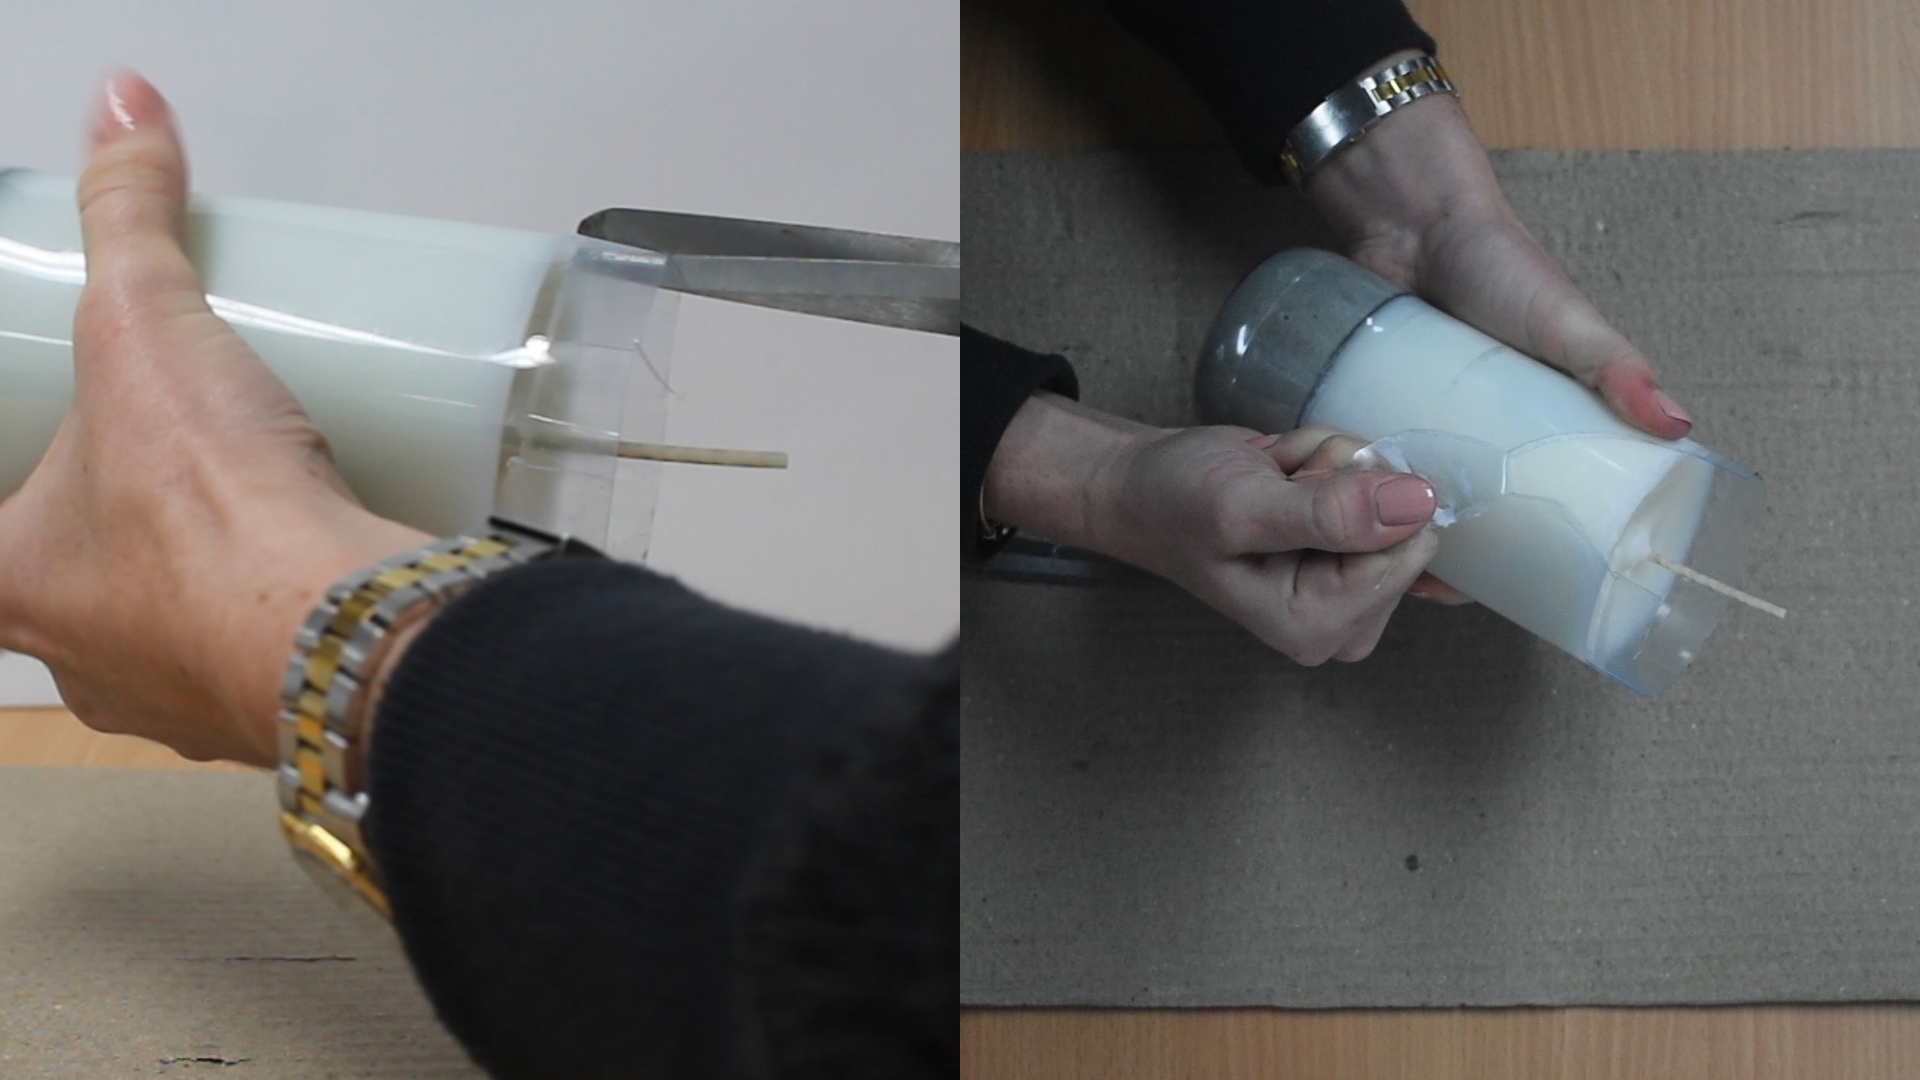 Once out use your scissors again to cut the wick shorter, if necessary.
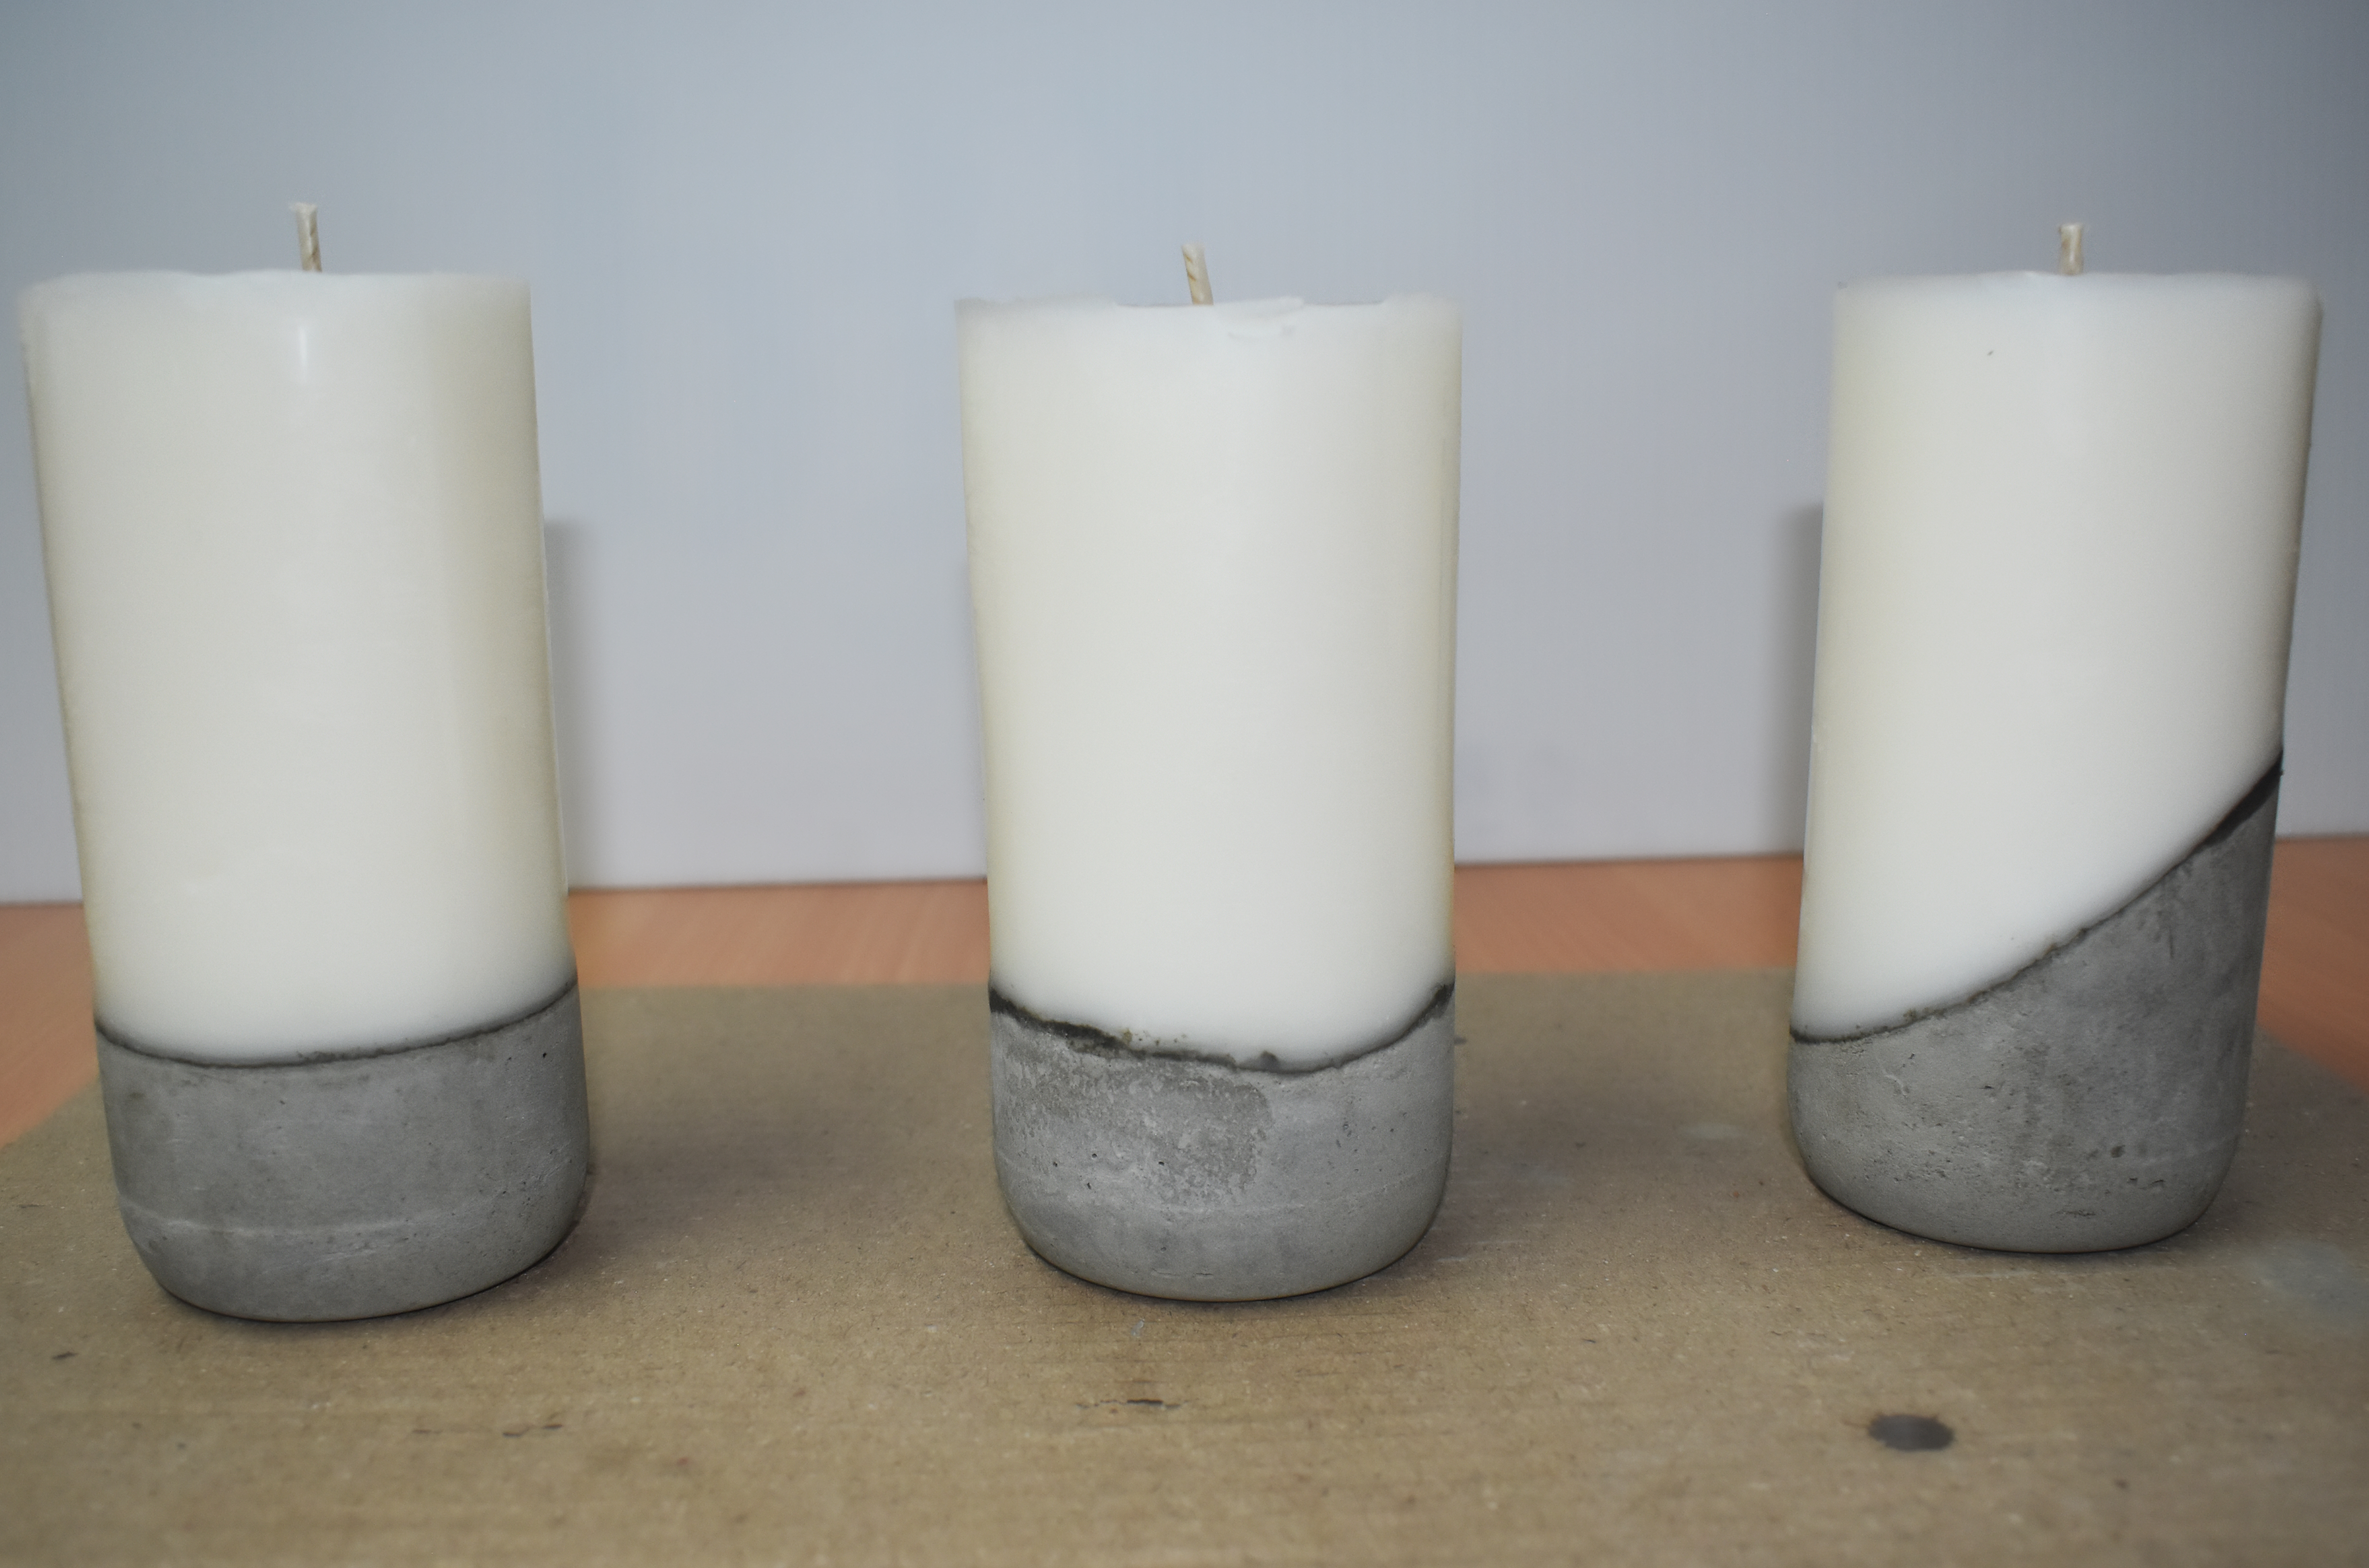
And there you have it, concrete candles that are perfect and thoughtful gifts or even just to keep for yourself. Let us know how you go!
Watch our video below to see it all in action.